In today's instalment of Tales from the Pixel Mines: Environment Mapping and Image Based Lighting!
We'll discuss Image Based Lighting, how the new ImageLight filter can provide reflections and lighting, and how to process environment maps to add roughness with the PanoramaBlur filter.
What is Image Based Lighting?
Image based lighting (IBL) is a technique for creating lighting from a texture. It's used in a lot of game engines and production pipelines. Now we've added a type of IBL to Phaser 4, and I reckon it's a useful addition to the toolbox.
But why bother with IBL when we have regular lights? Well, they both have areas they're good in.
Why not just use regular lights?
Regular lights are part of the scene. They have a position, so things can be positioned relative to them. This is good for dynamic situations with nearby lights, where anything could move and change the way the light hits it. But each light has a cost, and each light is something specific. In Phaser, they're points in space. Real light is more complicated than that. When you're outdoors, light comes from all over the sky at once. Even indoors, light bounces around to illuminate every nook and cranny.
Try it: can you see things in shadow? Of course! There's light falling on them from somewhere. (Unless you built a special box with a very small hole and used special materials to absorb light. I think that's cheating.) Historically, we approximate a solution by adding "ambient light", a level below which light doesn't drop. But this doesn't account for more subtle light interactions, such as bounce light. Stand on a green lawn, and green light shines up at you.
What about raytracing?
If you've paid much attention to graphics technology over the last few years, you'll notice a lot of games use raytracing technology. This uses raytracing to explore all the possible ways that light could bounce around a scene. The simplest situation is a set of mirrored surfaces, where you can trace a single ray through a series of reflections from the camera back to a light or to nothing. But in reality, most surfaces are not perfect mirrors. They are rough, diffuse. We can describe them as a series of "microfacets", tiny mirrors smaller than a pixel. Each microfacet faces a random direction, so each pixel effectively consists of many rays shooting off randomly into the scene. This is accurate, but it's costly to render, and it gets exponentially more costly as the quality improves.
So raytracing is a high-end feature. It's taken decades to develop it to the point where it can be used on the most expensive, modern hardware.
Enter environment mapping
Can we do something similar, but cheaper?
Sure - environment mapping! This is a much simpler technique, where we just render the environment from a given viewpoint. Now we can resolve raycasting questions by just sampling the rendered texture. This has been used for everything from skyboxes, to light probes in 3D scenes, to reflections on racecars.
Environment maps are not like normal textures. They have to look in every direction at once. They're basically spheres. And as anyone who's ever looked at a map knows, you can't draw a sphere properly on a flat surface. There are various approximations to this, from a single image known as a "360 degree panorama" to more sophisticated cubemaps. These approximations all have some level of distortion. Consider where the poles are on a globe; now consider that most maps draw the poles extending across the full width of the equator. It makes no sense! So these textures tend to look warped and bizarre.

Now, a basic environment map is basically a reflection. It might be a little fuzzy if the texture is low resolution, but even so, it's often easy to mistake for a perfect mirror. Diffuse light on a rough surface should be the opposite: each point accepts light from across an entire hemisphere of possible vectors. So it's often useful to blur out the environment map, so each pixel becomes the sum of the hemisphere around it.

To use environment mapping or IBL, all you need is your environment map, and a surface normal to indicate the direction in which light is arriving on the surface. And normal maps are common technology.
IBL has some disadvantages, of course. It has no sense of depth. The environment is effectively at an infinite distance. It's good for setting atmosphere or handling outdoor lighting where the Sun is at an immense distance, not for the intimate situations where regular lighting or raytracing might be better. But it is a cheap and easy way to add visual interest to a scene.
The Phaser 4 ImageLight Filter
So I invented a kind of IBL/environment map for Phaser 4. It's a Filter called ImageLight.
This filter is designed to handle any kind of surface reflectivity, from glossy environmental reflections to diffuse lighting. It is not part of the regular lighting system, although it can be combined with it.
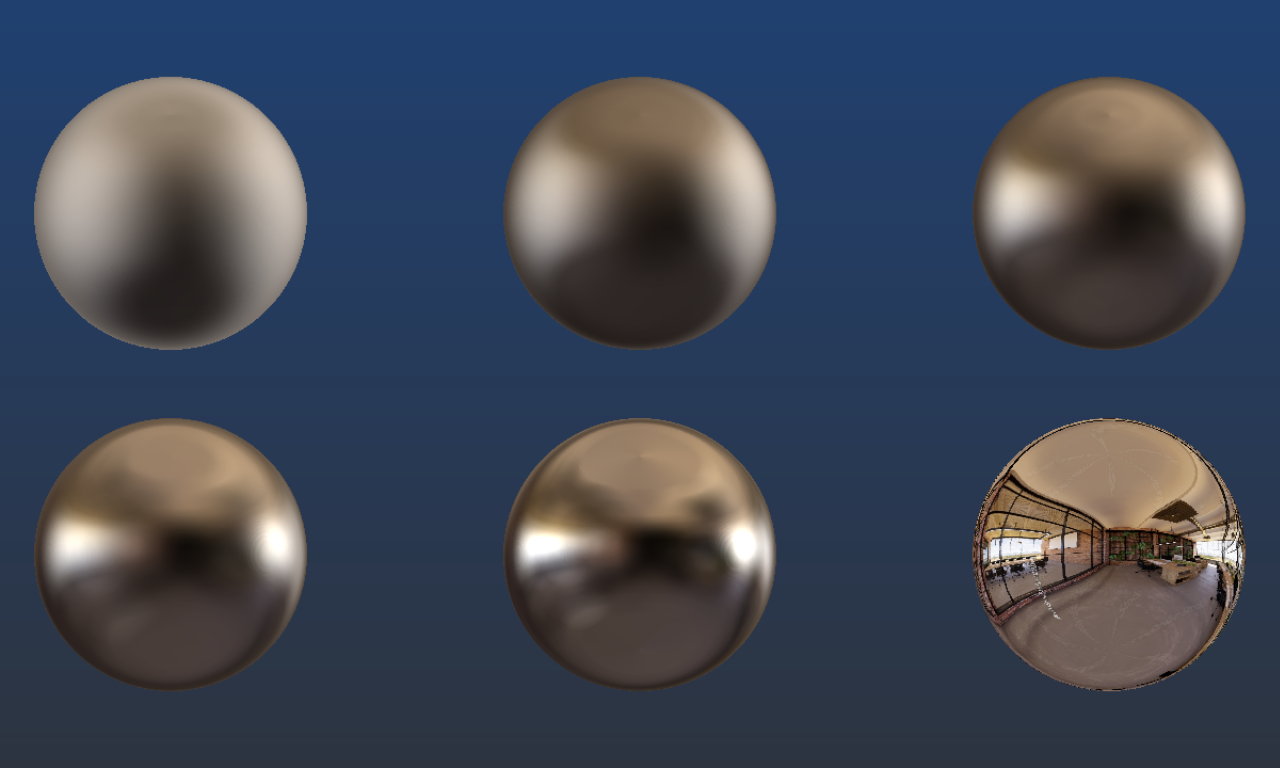
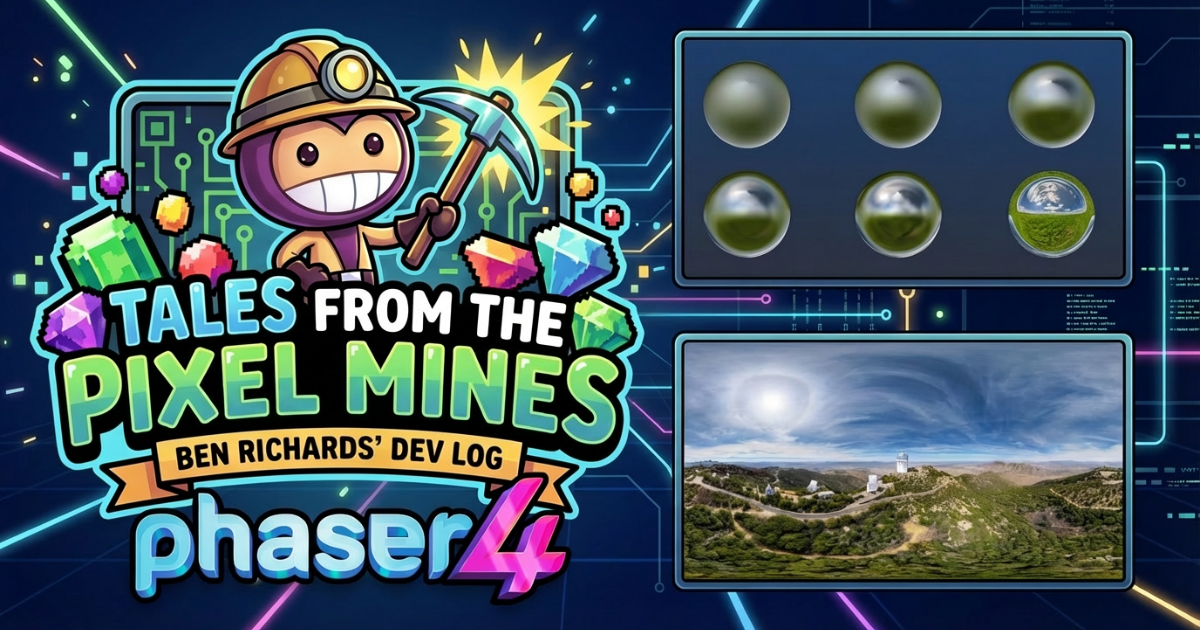
Here we see several orbs with different levels of surface roughness. This is a trick, of course. They're just white circles with a spherical normal map on them. Phaser is a 2D engine. But look at the sense of realism you get from these orbs! You can see bright patches where windows admit light, and dark patches from the dimmer carpet and corners, even when it's super blurred.
You can see several examples of ImageLight here.
ImageLight is a 2D effect, but it is designed to fake 3D environments. Three useful features include color factor, the view matrix, and bulge.
Color factor
The color factor is a tuple of factors for the red, green, and blue channels, by default [ 1, 1, 1 ]. This multiplies the output of the shader. It is often necessary to boost the color factor, based on the brightness of the filter target and the environment map. This isn't true high dynamic range rendering, but it does give you better control over the output.
View matrix
The view matrix is a Matrix4 attached to the filter. It can be rotated in 3 dimensions, changing the view of the environment. This can be useful for games with specific perspectives, such as an isometric view. However, this only works with proper panorama textures where the top and bottom are each perfectly smooth, and the left and right sides perfectly wrap: artifacts will appear if not. (A simple gradient can also meet these criteria!) The special case of 2D rotation doesn't change the perspective. You can set the 2D rotation to automatically follow a target game object, so the lighting stays correct as a sprite rotates.
Bulge
Bulge is a parameter designed to create the illusion of locality in ImageLight. It distorts the surface normals based on their screen position. Thus, two pixels with a flat normal map but at different positions will reflect slightly different parts of the environment. This helps to reduce the "infinite distance" issues with IBL.
Types of Environment Map for Phaser 4
You can use any kind of texture as an environment map for ImageLight. Here are the best approaches.
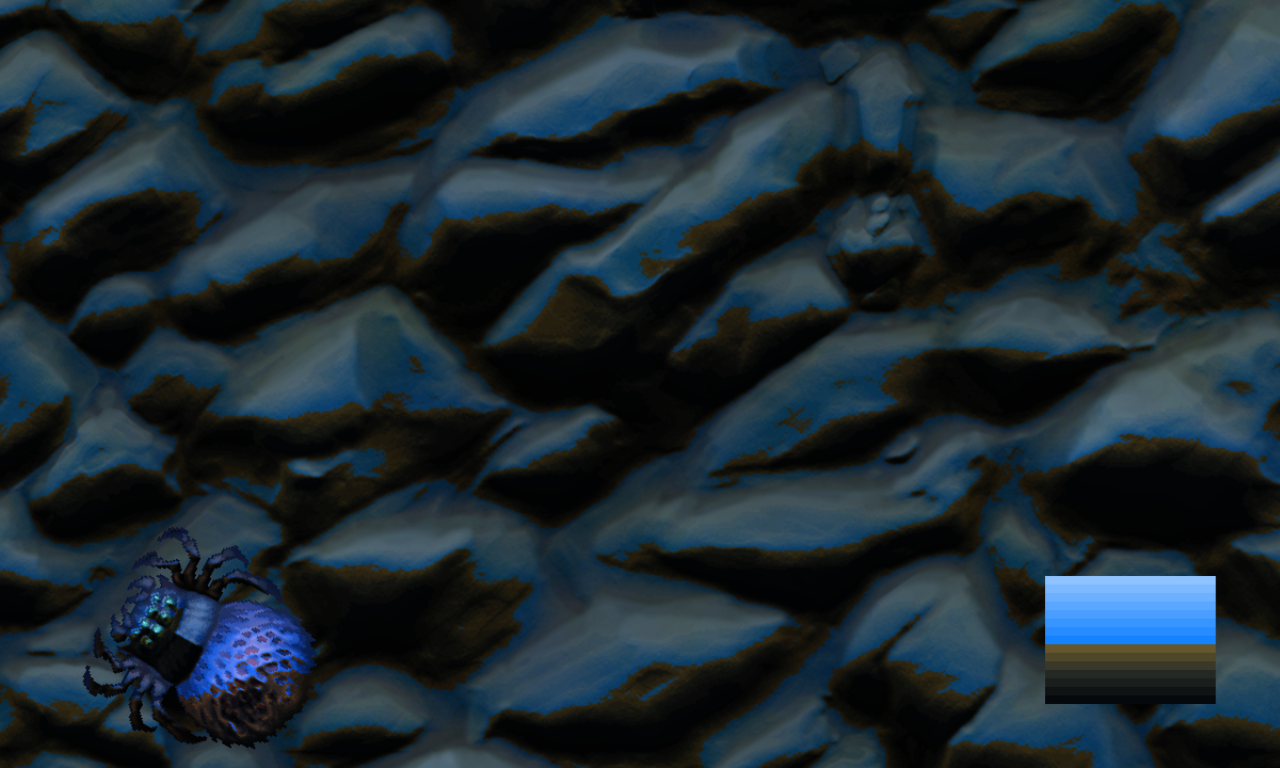
A gradient is simple but effective. Most of the detail comes from the normal map, but this is plenty to establish a scene. It helps if the top and bottom are both single colors, and the sides wrap.
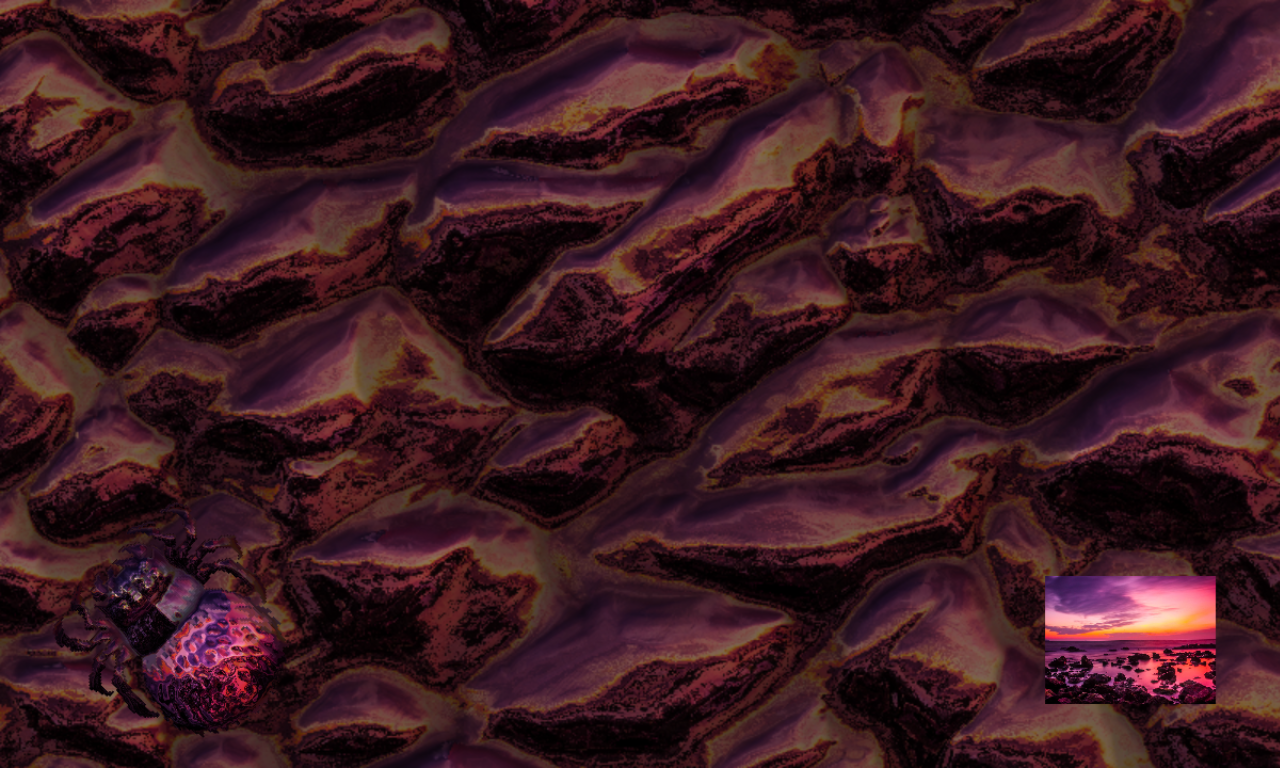
A picture can often be perfect, even if it's not a panorama. If you don't adjust the perspective, it often still looks perfect! But if you do shift the perspective, seams might appear. Know your application, and you'll know whether you can get away with pictures. This can be particularly useful, as you can use screenshots, renders, and simple photos of everyday scenes (maybe minus any identifying information) as environments. Often, your environment map won't be seen clearly, so you can collage together a pleasing set of elements and still get great results.
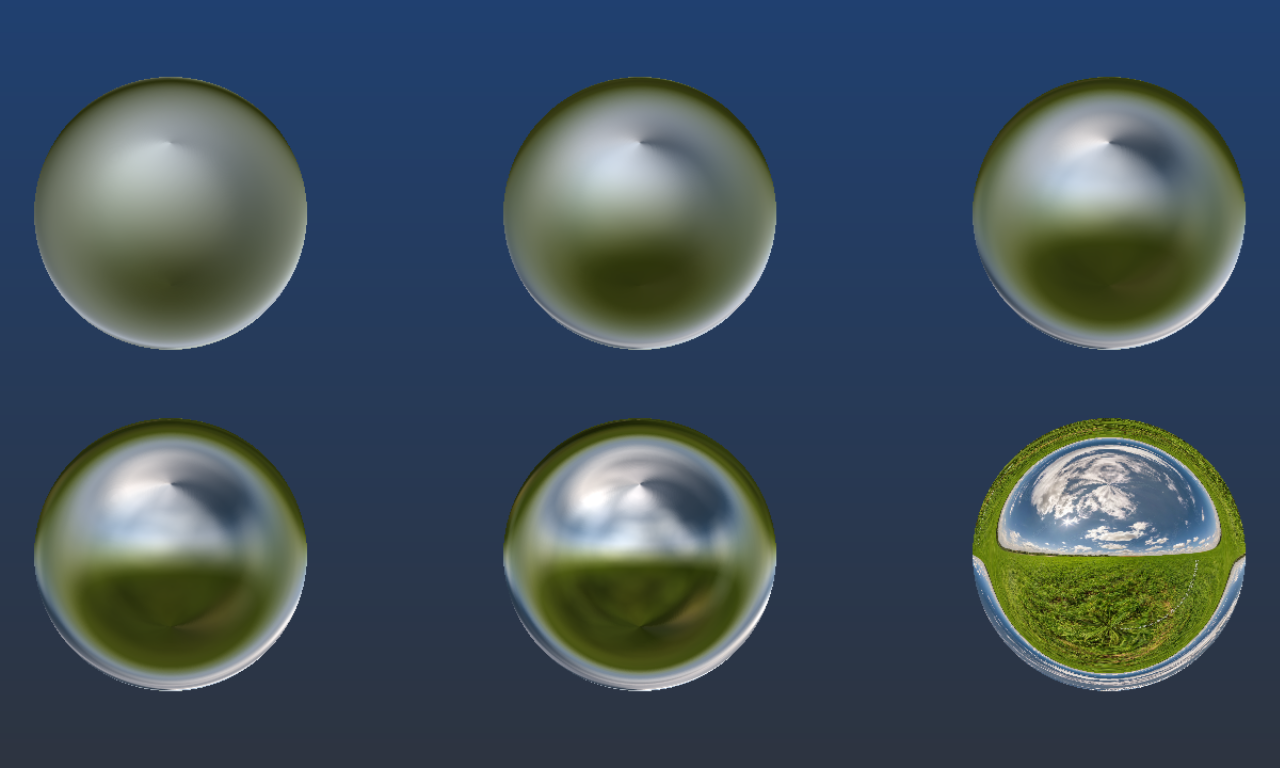
A panorama is the ideal input. This is a flat texture with 360 degree lateral coverage and 180 degree vertical coverage. It should have a smooth top and bottom, and sides that wrap. Panoramas are shown earlier in this article. It's a little tricky to make your own, but it is possible, or you can go to Adobe Stock or other sites and look for "360 degree panorama". These files are often very high quality, as they're designed for VR, so you can easily scale them down and still get great quality in-game. Just be sure to check whether they're really true panoramas, as people can exaggerate the quality of their uploads.
There are better formats for IBL, such as cubemaps, where every surface of the cube represents a different direction for low distortion projections. We chose against using cube maps, because that raises the bar to entry. You can't just use gradients and photos and collages if the system requires a special cubemap format! WebGL does support cubemaps, but Phaser 4 does not, at this time. I figured it was best to keep things simple and accessible. And I've been very pleased with the results so far.
Diffuse Lighting with the PanoramaBlur Filter
Environment maps will probably be crisp, good for glossy reflections. But what if you want diffuse lighting?
Well, we've made a solution for that: the PanoramaBlur filter. This uses a huge grid of samples to compute light from a hemisphere or smaller angle, allowing you to simulate different degrees of roughness.
You shouldn't use a regular blur for environment maps, because they are anisotropic. Distances and angles change their meaning in different parts of the image. Pixels close to the poles are hugely distorted, and may be closer to pixels on the other side of the image (via the pole) than to pixels that seem to be nearby.
PanoramaBlur also supports a power term, allowing you to change the gamma curve of the output. This can be useful for enhancing the brightness of the Sun by darkening everything else. If you do this, you should turn up the colorFactor of the target ImageLight controller to higher than [ 1, 1, 1 ], simulating high dynamic range.
There are probably higher quality ways to render these spherical blurs, and I recommend using them where possible. Loading a pre-computed texture is cheaper than computing the whole blur anew. In particular, you shouldn't render PanoramaBlur every frame, because it is very expensive! However, for real-time environments, you might have to render PanoramaBlur anyway.
Advanced Real-Time Environment Maps in Phaser 4
It's simple to use ImageLight to create a static environment, but what if you want to update the environment?
There are 360 degree panorama videos, but these are often way too big to be practical for a game.
Instead, you can use real-time compositing to create a texture to use as an environment map. This could be as simple as using CaptureFrame to copy your game screen, or a more elaborate approach using DynamicTexture and specific sprites moving around. In theory you should have a full three-dimensional scene to create realistic environments, but in practice a limited 2D perspective will hide many imperfections.
You may still want to consider three dimensional space. The region most directly visible in reflections is in the direction of the viewpoint, not the rest of the scene! How you resolve this is up to you. You might create a miniature scene just for rendering things "behind the camera". Or you might just fake it.
If you are using PanoramaBlur to roughen the output, be aware that it is an expensive operation. Consider downsampling the environment map to reduce the cost of any blurring.
When Normal Maps Go Wrong
Let me tell you how I thought it was all broken.
I was writing this very article, taking screenshots, and I noticed a little problem. There was pinching at the poles. The blur looked good, which should have eliminated all heterogeneous detail around the poles; and yet, there it was.
Upon closer inspection, there were other issues, too. Even in the unblurred orb, you could see details warping around the poles. And the image flips completely upside down around the borders, which isn't how orbs actually work.
I have the privilege of seeing a sculpture called Kimi / You are here, by Seung Yul Oh, a 3.7m diameter stainless steel object which reflects its environment. Anyone who visits the waterfront in Wellington should give it a look - it's simple but fascinating. And it's mostly an orb, so I can look at it and see what an orb should look like.
So I could see that things were wrong. But what? There were so many places where something could have gone wrong. Was it the PanoramaBlur, taking too many samples around the polar regions? Or was it the ImageLight itself, generating incorrect normal reflections? I hacked the shaders for both, trying different solutions in case I'd made a mistake, outputting debug information of normal vectors and texture coordinates, and nothing worked.
Then I looked at the normal map I was using. And guess what? The shaders were fine. The normal map was wrong.
This is a normal map I generated myself. I built it with Phaser gradients (another new feature)! But I made one little mistake.
A normal map is a texture encoding of a vector. The XYZ components map to RGB colors. The vector can point in any direction; a length 1 vector must thus have XYZ ranges of -1 to 1. But a texture can only store values from 0 to 1. So we scale them up, such that a vector component of -1 is 0, 0 is 0.5, and 1 is 1. This means that a flat surface is a vector of [ 0, 0, 1 ] but a color of [ 0.5, 0.5, 1 ].
The X and Y axes turn out to be linear gradients. The vectors go from -1 to 1 from one side to the other, so the colors go from 0 to 1. That's simple.
The Z axis goes from 1 at the middle, where it faces the view, to 0 at the sides, where it is orthogonal to the view. This is where I made a mistake. I generated the blue channel from 1 to 0, using a curved gradient. It should have been 1 to 0.5.
Thus, the edges of the orb weren't pointing to the sides. They were actually flipping around and facing backwards! This caused all of these distortions. You can't naturally see surfaces facing away from you... unless you mess up the normal map like this.
The shaders were fine. I'd been testing them with other assets, and they worked perfectly. That should have clued me in on the fact that only this normal map had problems. But it took me a moment to figure it out.
Wrapping Up
ImageLight is simple, but powerful. I find I'm using it all the time to add interest to examples, test normal maps, and such. It's often easier than setting up lights in a scene, although it is not as dynamic as a regular light. And it can render very good looking scenes.
I look forward to seeing what people can do with this technology. It's an old technique, but it's new to Phaser.
Ben Richards, Senior WebGL Developer, Phaser Studios Inc
See ImageLight in Action
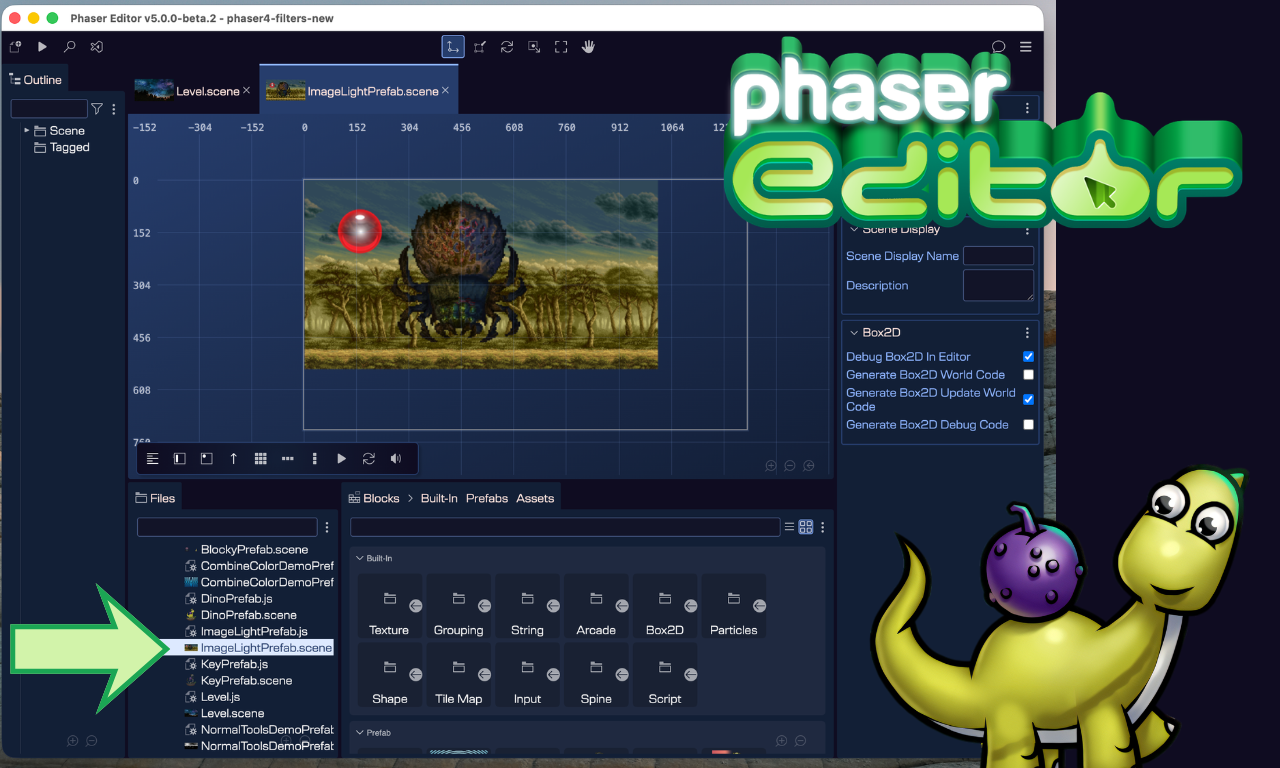
Explore ImageLight right now in Phaser Editor v5 and see your games in a whole new light!